macOS Big Sur, as the newest version of macOS, was released on November 12. It’s a big update with many useful features that can attract you to update your system to the latest version. In this article, we will show you all the information and things you need to prepare to upgrade to macOS Big Sur.
New features available in macOS Big Sur
In this big update, you can find some new feature that make the Mac system with better UI, performance, user experiences. Here we will introduce some of the major changes in the new system.
New Design. In this new new update, it provides a new modern but familiar look. Also, the new design focus on consistency and content. Redesigned toolbars and sidebars provide a more streamlined look across the operating system. New symbols throughout macOS Big Sur make it clearer where to click and what happens when you do some operate. Besides, a new and customizable Control Center enable quick access controls to Wi-Fi, volume, Dark Mode, Night Shift, etc.
All-new Safari. You can enjoy a better Safari browser in macOS Big Sur. In the new version of Safari, you can customize the start page with a desired wallpaper now. You can also add wanted items to the start page. More extensions are available now for Safari users. It can work better for 4K HDR content that makes you enjoy better experience when visiting some websites, like YouTube, Netflix, etc.
Messages. The Messages app on Mac can work nearly the same on iOS 14 devices. It can be very friendly for users to use the same app on difference devices.
Redesigned Maps. Like the Messages app, it was designed to work the same way on iOS 14. More features are new also available on Maps for Mac now. Also, the new version of this app is improved to help you find your way easier.
There are more other features updated, like faster updates, privacy information in AppStore, optimized battery charging, improved search for Messages & Music, and so on.
How to upgrade to macOS Big Sur?
Do you want to upgrade to macOS Big Sur now? You need to check more information and prepare your Mac first for the update. Here are some points you need to pay attention to before the update.
First, please check if your Mac is compatible with macOS Big Sur. Based on the Apple’s official information, only the following machines support macOS Big Sur.
- iMac (2014 and later)
- iMac Pro (2017 and later; all models)
- Mac Mini (2014 and later)
- Mac Pro (2013 and later)
- MacBook (2015 and later)
- MacBook Air (2013 and later)
- MacBook Pro (Late 2013 and later)
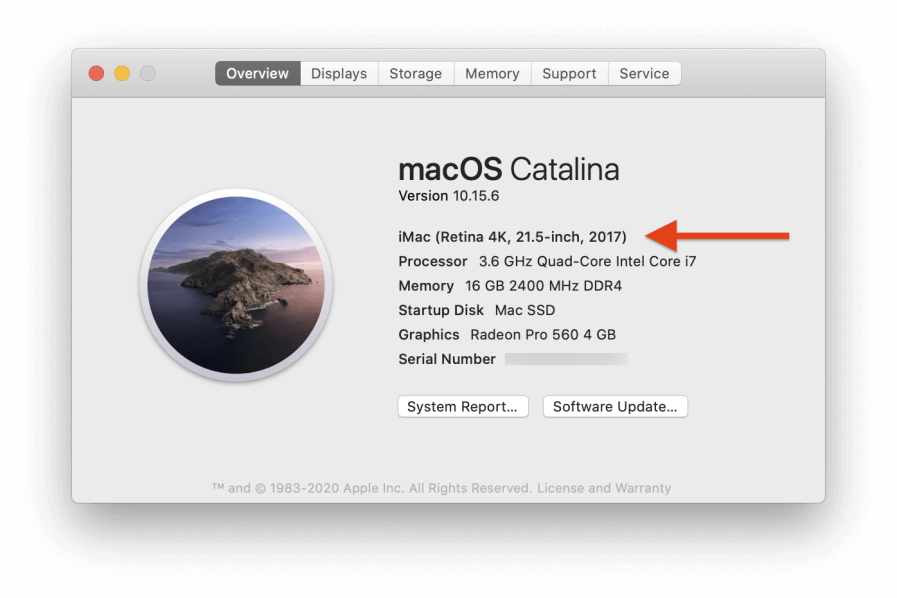
You can check the model and year of your device directly if you are not sure. Please go to the Apple menu, and choose About This Mac. Then you can see the information there.
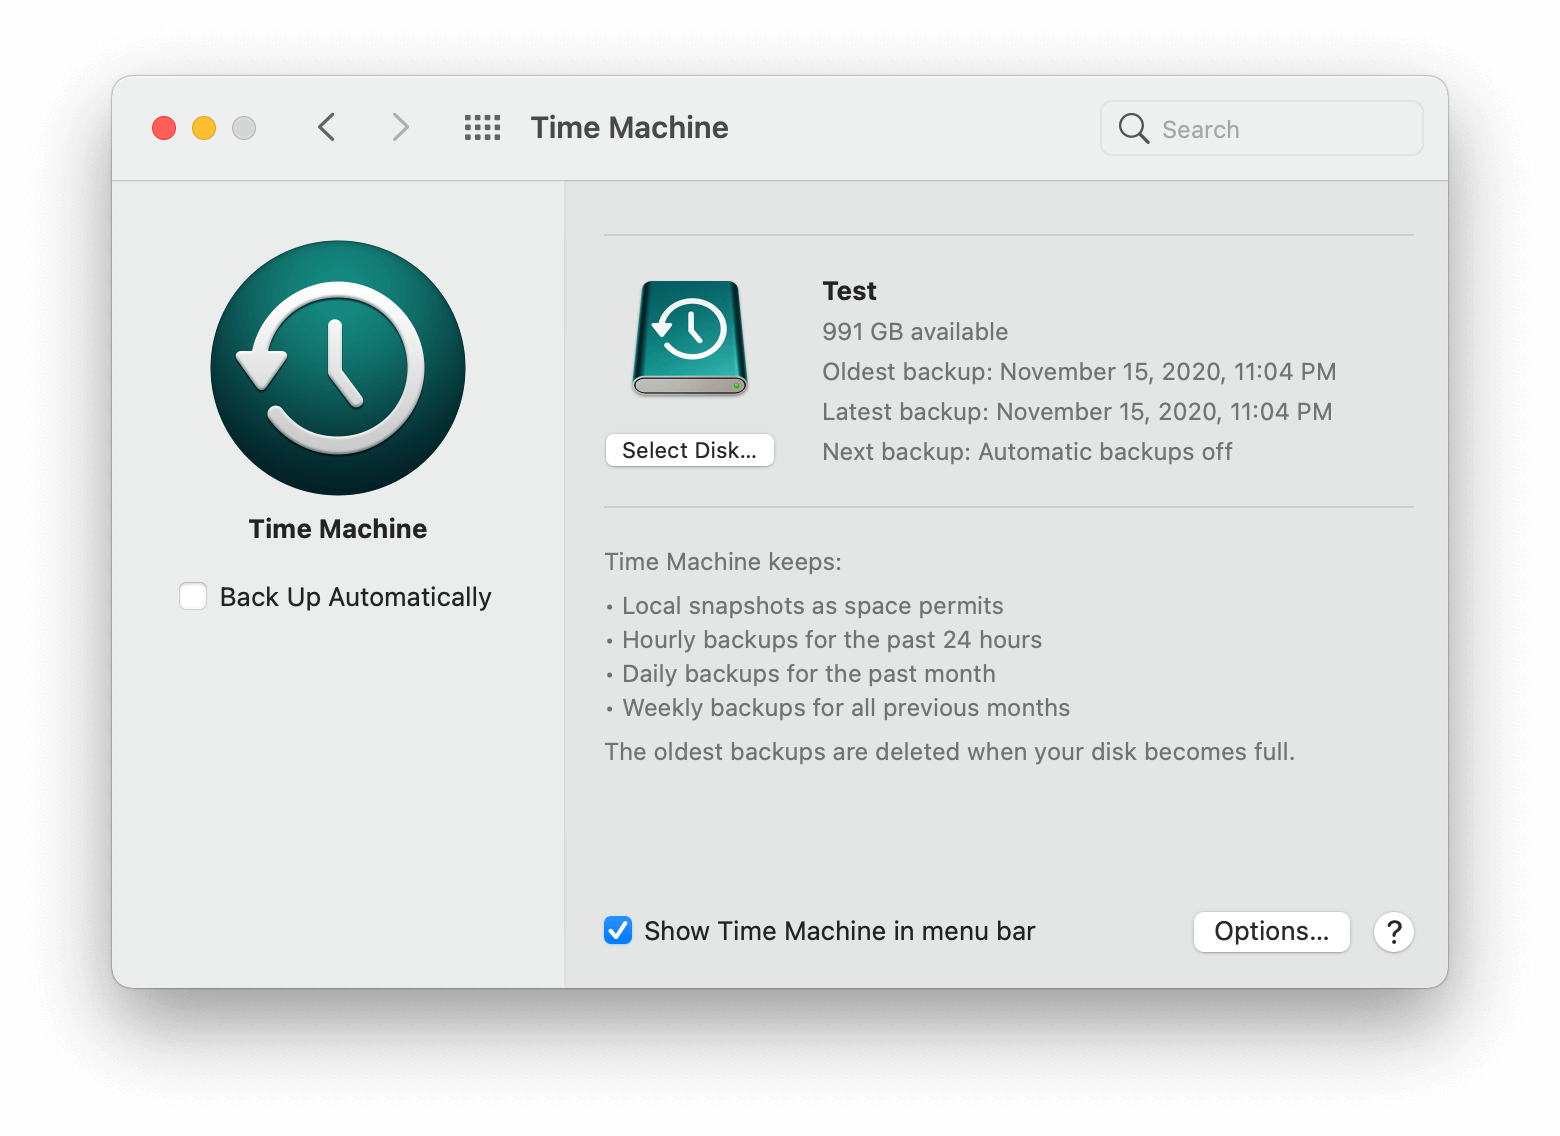
Second, it’s necessary and very important to back up your data first. We always suggest you back up your Mac with Time Machine. It’s reliable and free backup solution on Mac. You can do as follows to back up your Mac with Time Machine.
1) Connect an external drive and format it for macOS.
2) Start Time Machine from System Preferences > Time Machine.
3) Select the external drive for the backup and follow the wizard to continue directly.
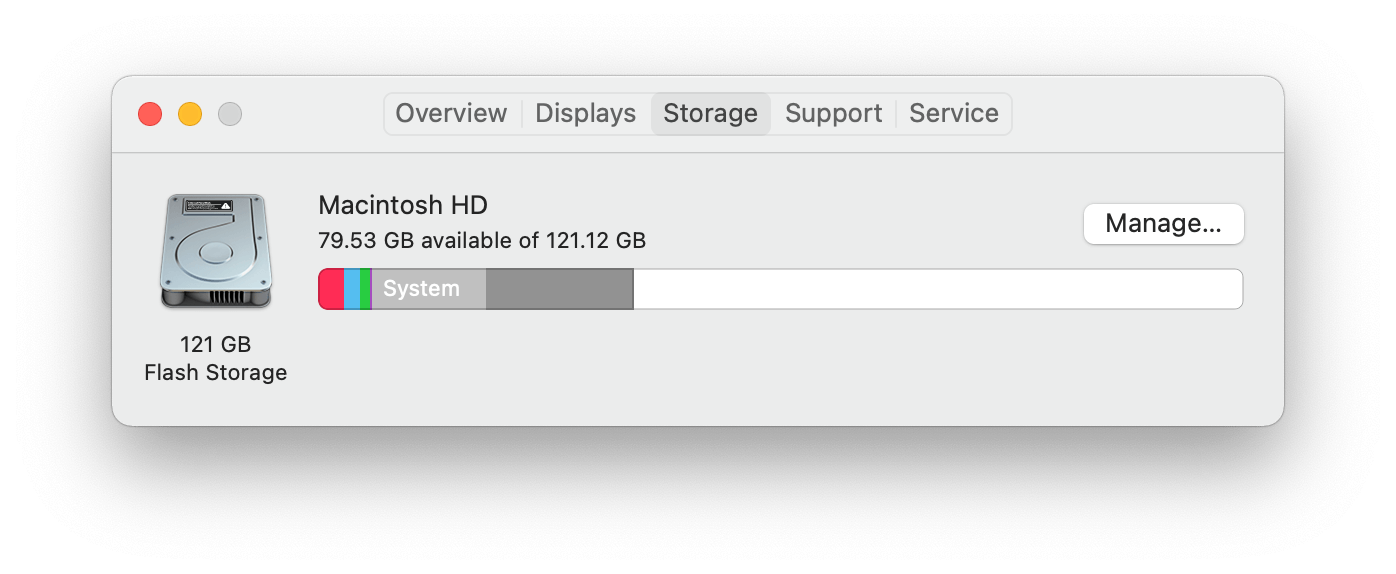
Third, check and free more space for the update. As the new version update will require some free space in order to complete the update successfully, please check and free some space first. Please click the Apple menu > About this Mac, then clicking on Storage to check the space. If the free space is not enough, you can click the “Manage...” button to check and deleted some data/apps to free more space.
Steps to install and upgrade to macOS Big Sur
Now you can follow the steps below to upgrade your system to macOS Big Sur. If you've got Mojave or Catalina installed on your Mac, you can just check the update to get the new system.
Please click the Apple icon > System Preferences... > Software Update (or Apple icon > About This Mac, click the “Software Update...” button under Overview). It will check for updates directly and show you the macOS Big Sur is available. Please click the “Upgrade Now” button to download the installer.
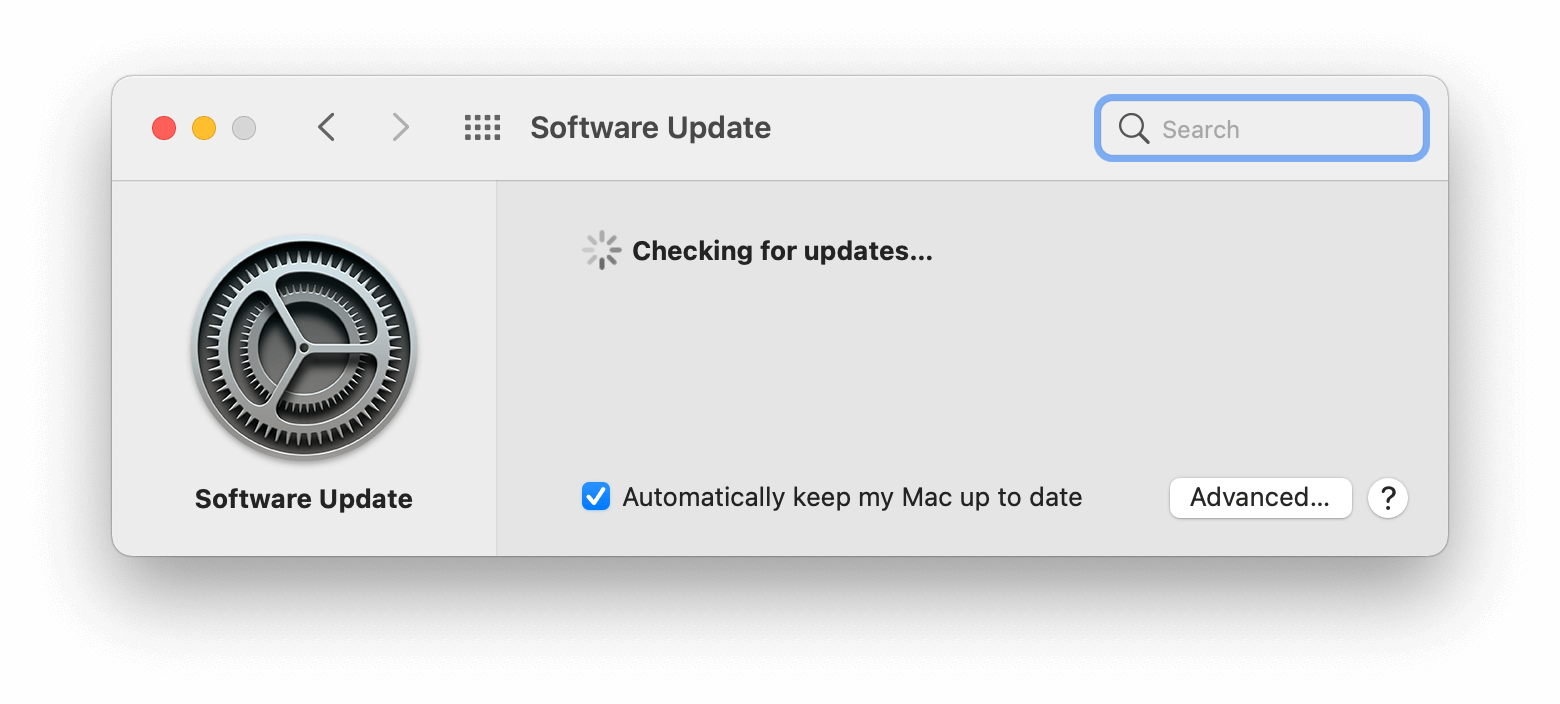
Once the installer has downloaded, you can continue to install the new system directly. It will install and update automatically. It will take a while and reboot the system once the update process is finished. Then you can enjoy the new version macOS Big Sur on your Mac.
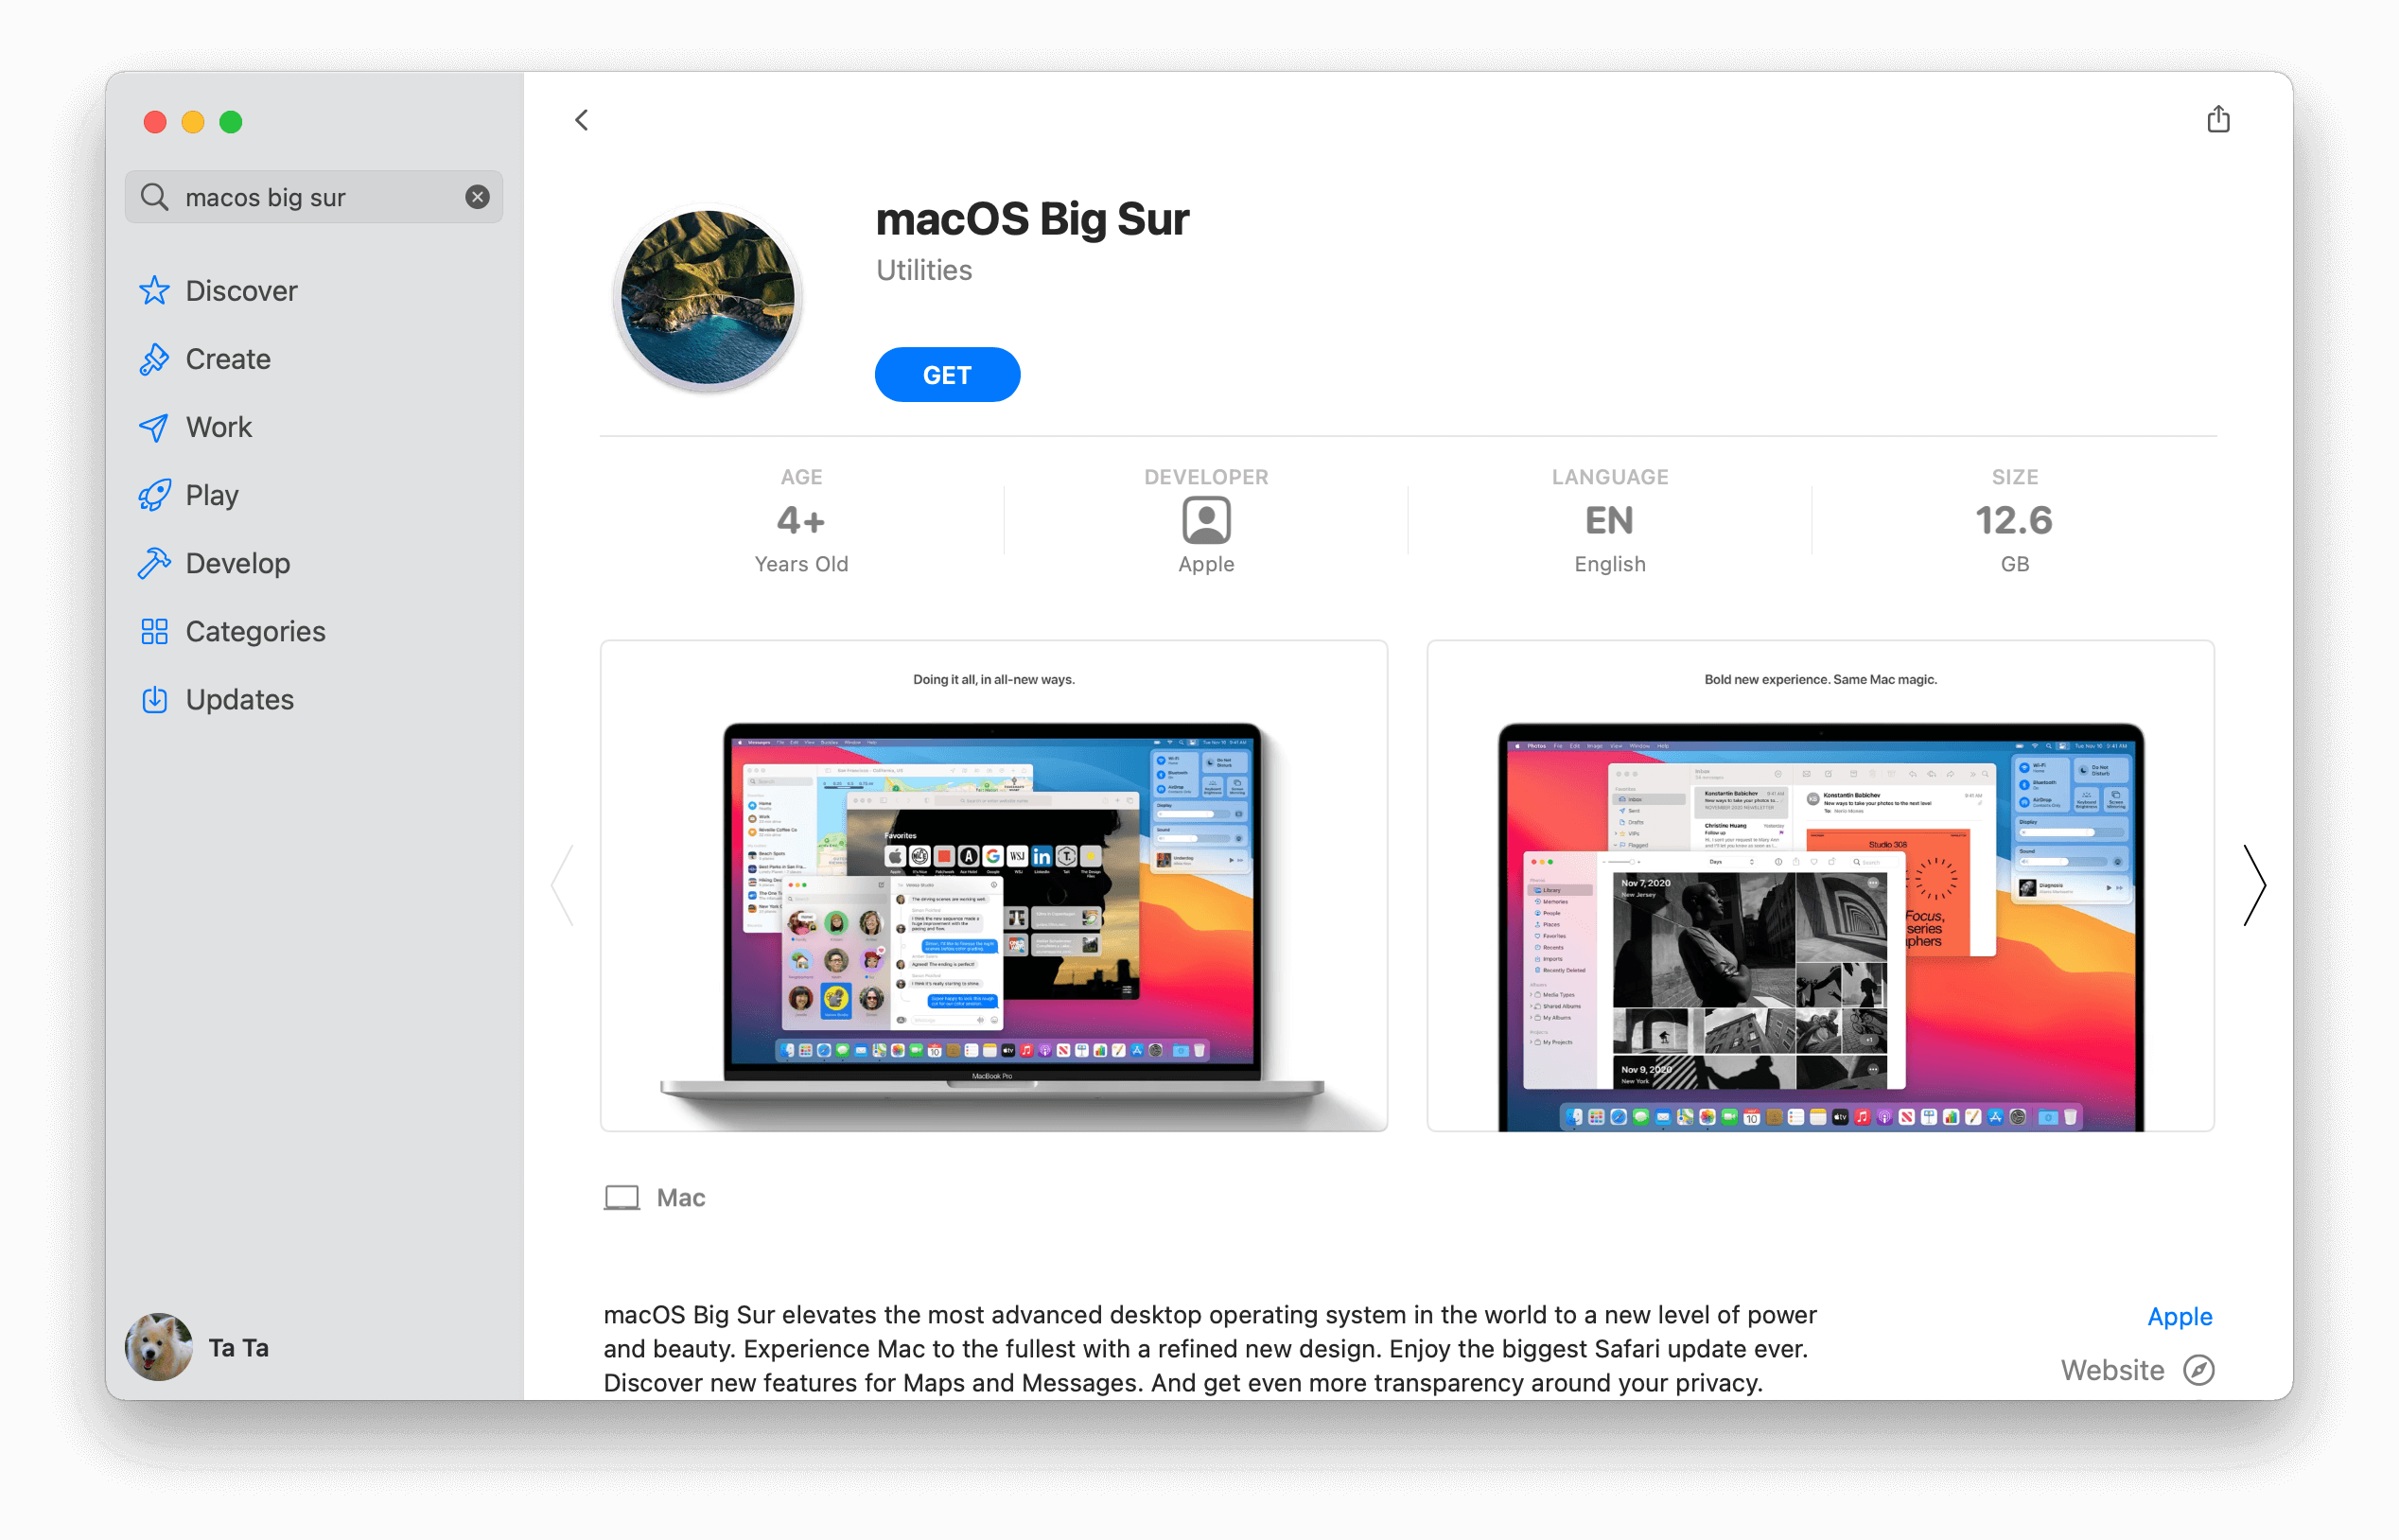
If you are using the Mac with an old version of operating system, you can then go to the AppStore to search and download the installer for macOS Big Sur. You can click GET button to download it directly. After it’s downloaded, a window will pop up and ask to Continue. Then you can follow the wizard to install the macOS Big Sur directly.
Issues you may encounter and the fixes
Unfortunately, there would be issues while upgrading to the new macOS Big Sur for some users. For example, power outage, system crash during the update, or other issues may cause the update failure. If the system can still boot into the old system, you can just try to check the power, connection, disk space, then try to update again.
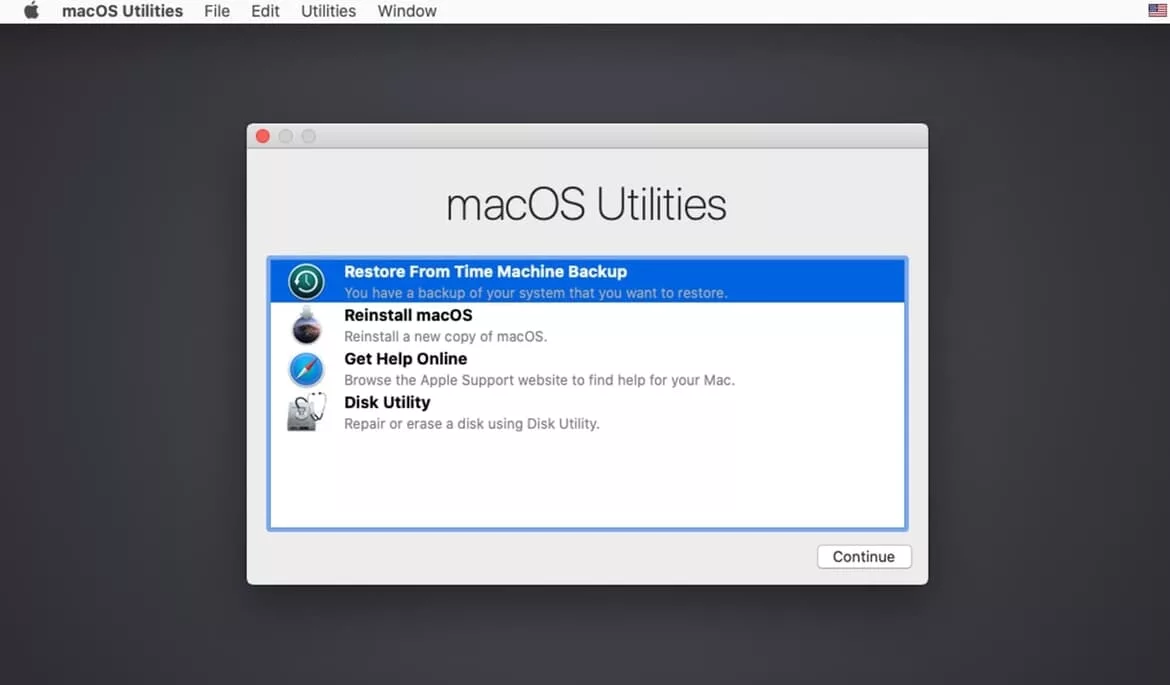
If the machine cannot boot into the system, then it’s necessary to boot with Recovery mode and restore the system with your Time Machine backup. Please restart the Mac, press and hold Command + R keys to start up from macOS Recovery. Then you will see the option “Restore From Time Machine Backup”. You can click the option and continue the wizard to restore your system directly.
The another issue you may encounter is data loss. If you find some files are missing after a upgrade failure for macOS Big Sur, you can also try to restore the files from the Time Machine backup. However, if you forgot to create a backup, then you may have to find another way to recover the lost data. In such a case, we suggest you download and have a try with TogetherShare Data Recovery for Mac to help you recover the lost data.
TogetherShare Data Recovery for Mac
Powerful & easy-to-use data recovery software for macOS Big Sur
The software is easy to use and can recover different types of data on Mac. It’s very effective to recover lost files in any data loss situations. With only a few steps, you can recover the lost data by using this Mac data recovery software. The quick guide below can show you how to do the job.
Step 1. Install and launch the software on your Mac.
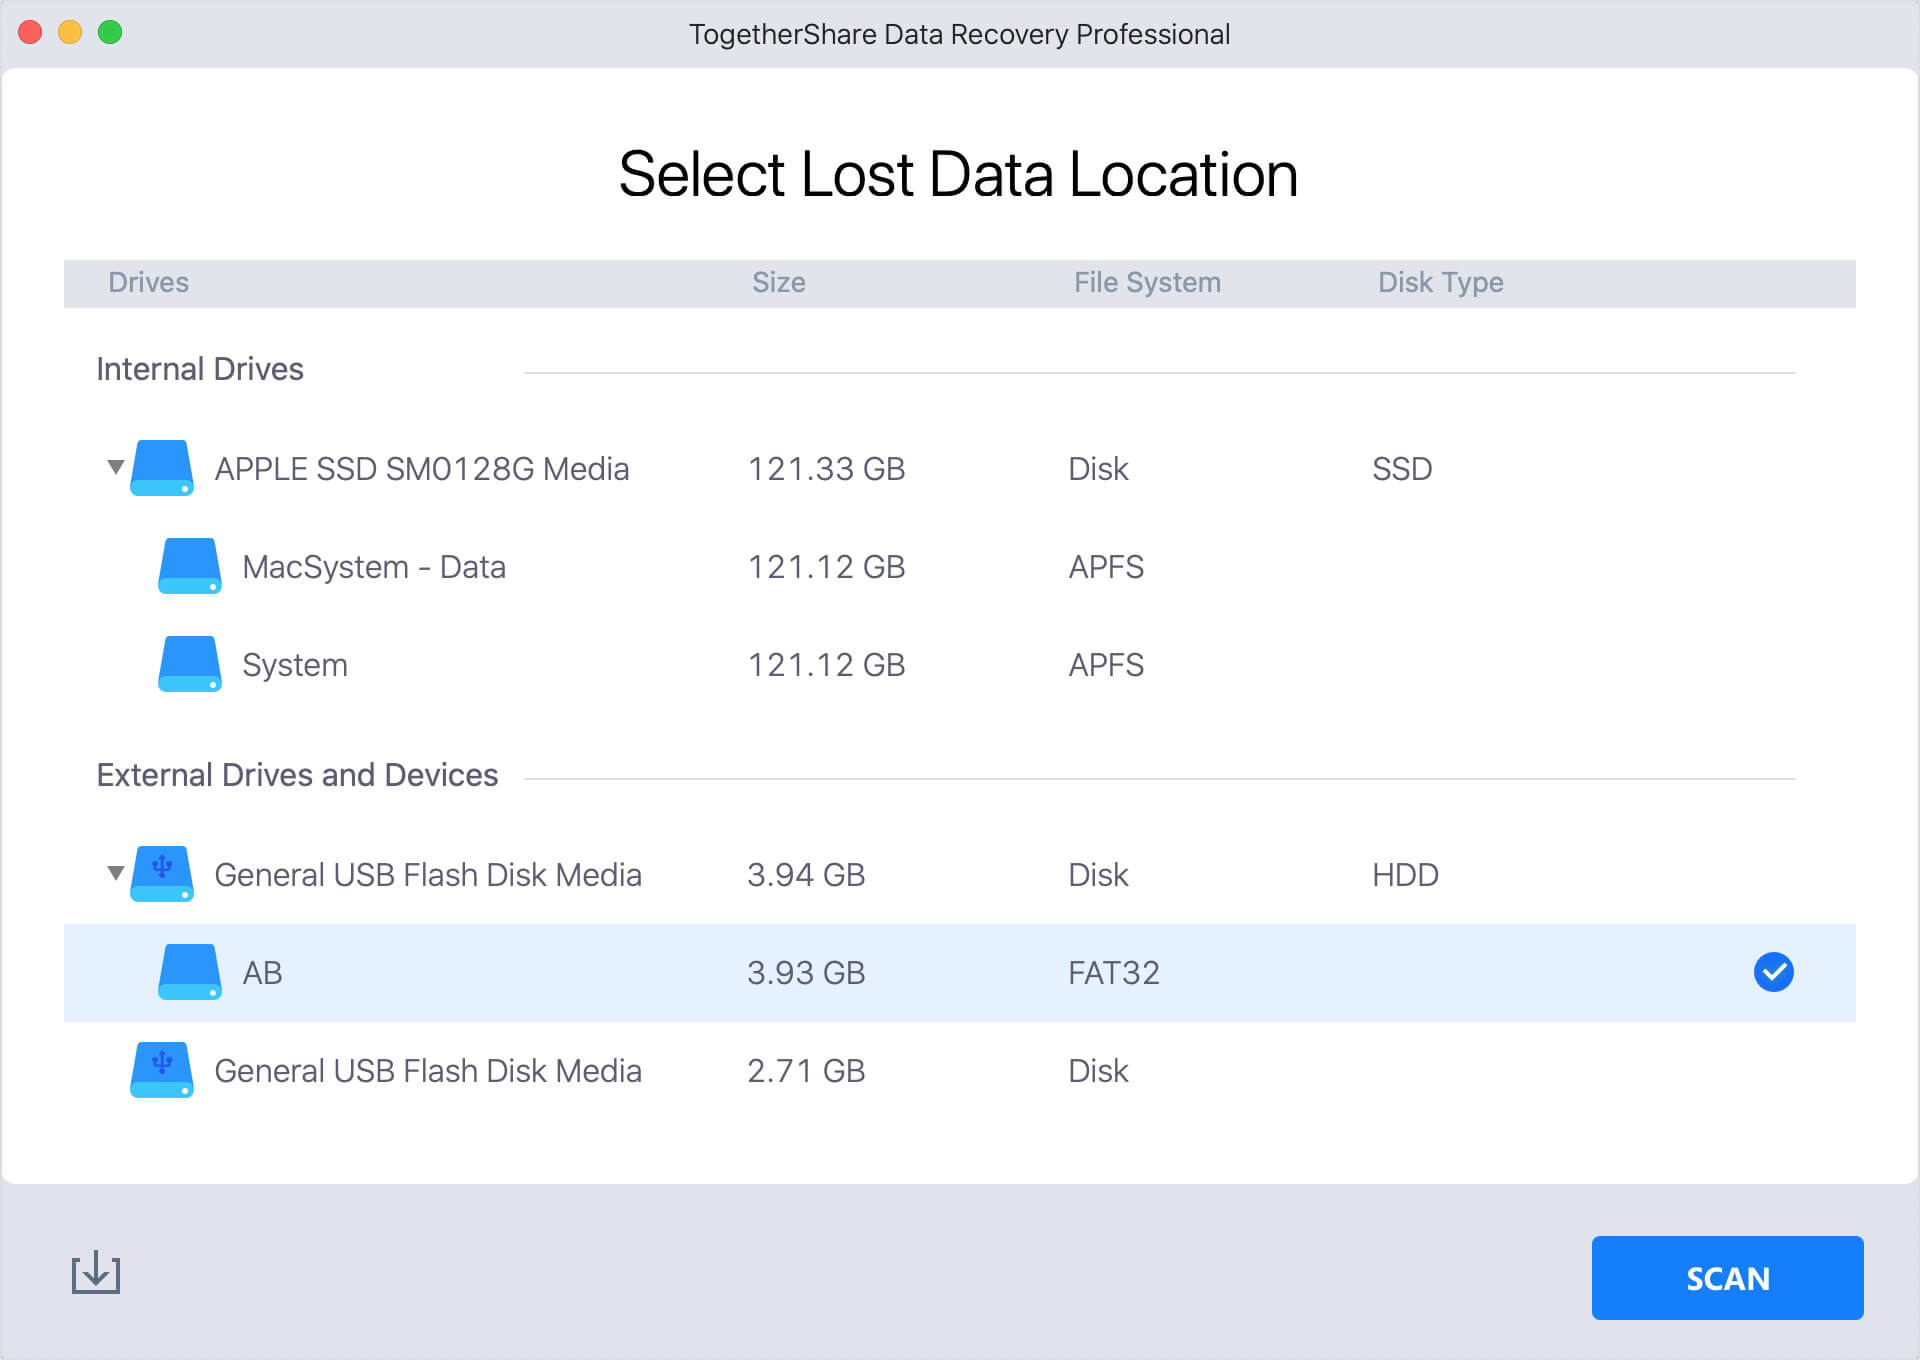
Step 2. Choose the drive and scan it to find the lost data.
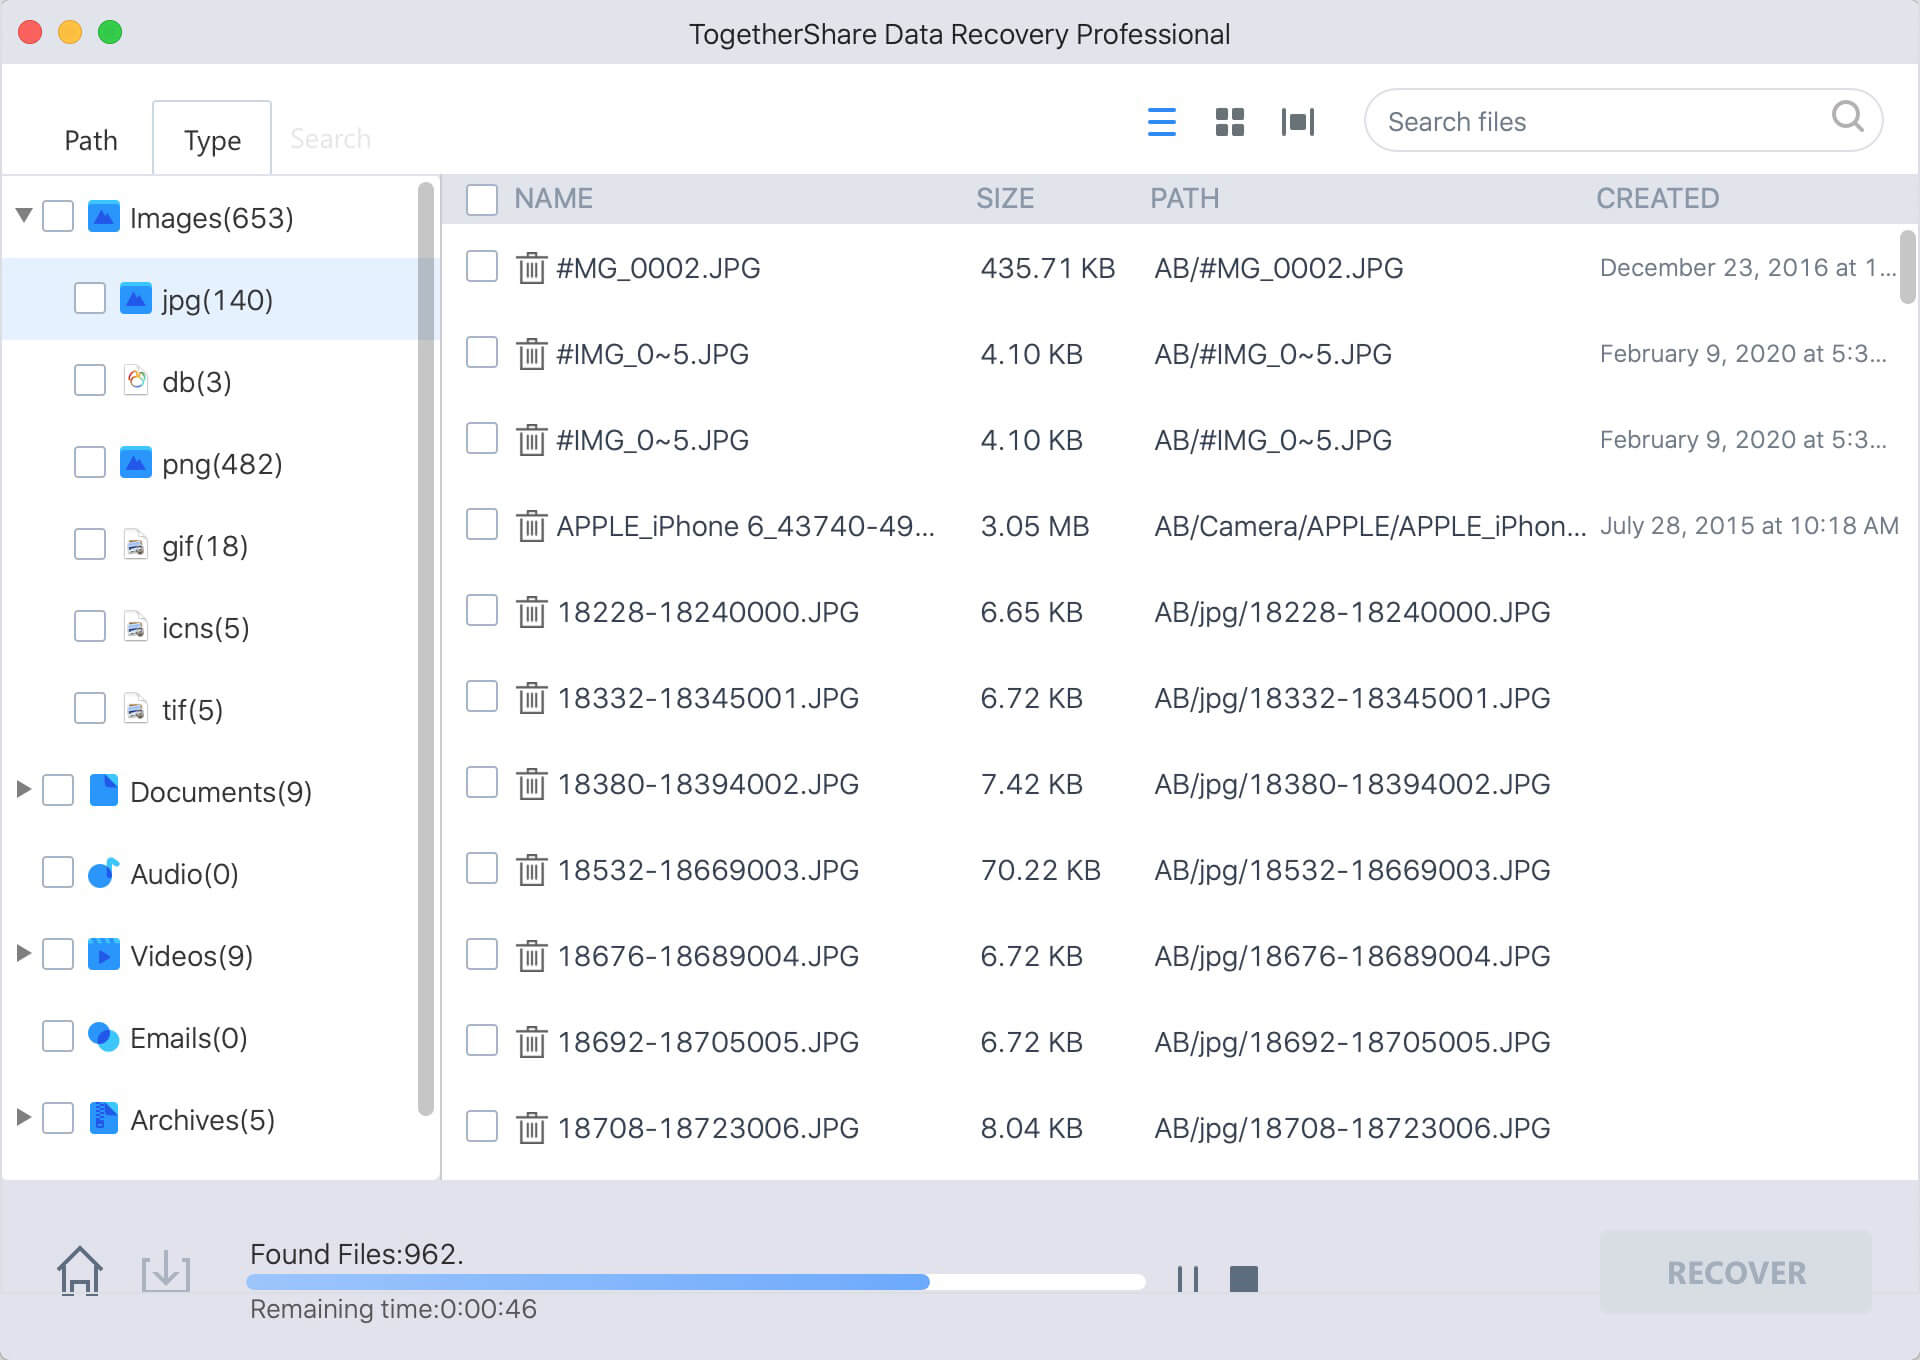
Step 3. Check and recover the files after the scan is finished.

The software can not only recover the lost data due to update issues, but also it can recover deleted files, formatted data, lost files that are missing due to system crash , file system damage, partition corruption, human errors, and other cases.
Mostly, it would be very smooth to install or upgrade macOS Big Sur. Also, to avoid data loss in the future, we suggest you always create regular backups for your macOS Big Sur. Now you can use and enjoy macOS Big Sur on your Mac.
