There are many issues would happen on SSD and cause the drive crash, such as sudden power outage, electronic components malfunction, SSD firmware bugs, controller chip going damaged, excessive bad blocks on the SSD, wearing of NAND cells with age, etc. After SSD crash, you will not able to access the SSD or the data on it normally. If you want to access and reuse the crashed on Mac, you need to fix the issue first.
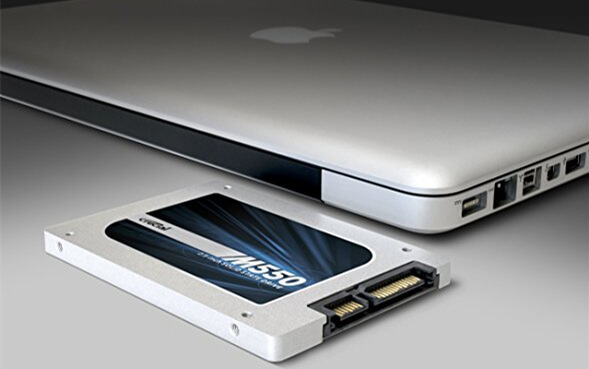
Actually, drive crash always happen on SSD for many users all around the world. There are so many users ask for about how to fix crashed SSD on Mac in many forums. Actually, there are some methods can fix crashed SSD on Mac. We will also share a complete and trusted solution for Mac users to fix crashed SSD on Mac.
Recover lost data from crashed SSD on Mac
Normally, if the SSD is crashed, you will also lost the data on the SSD. It’s necessary to recover lost data from crashed SSD first. Then you can try to fix the crashed SSD. Because there will be some changes to the drive and data during the drive repair process.
To recover lost data, there are many choices for you. There are so many Mac data recovery software in the market. For example, TogetherShare Data Recovery for Mac is one of the best data recovery software that can recover lost data from crashed SSD on Mac.

TogetherShare Data Recovery
After downloading and running, you can easily operate the software and just follow the wizard step by step to get back the lost data quickly. It’s very important to avoid any further changes to the crashed SSD before the data is recovered successfully.
How to fix crashed SSD on Mac?
Once the data is recovered, then you can feel free to fix crashed SSD on Mac now. There are different ways to fix the crashed SSD on Mac. Here we will introduce some methods for you to do the job easily and effectively.
Method 1. Fix crashed SSD on Mac with First Aid.
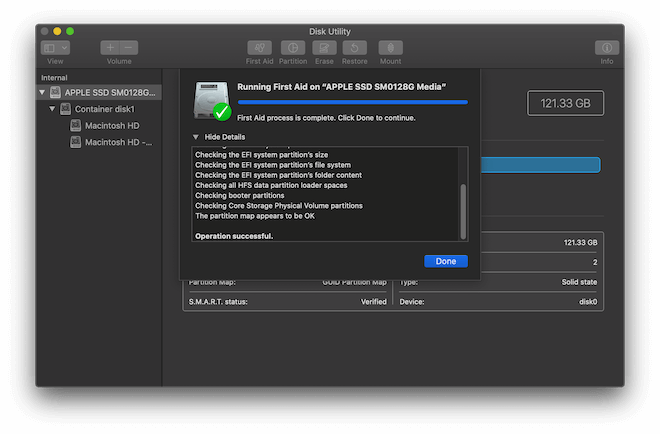
First Aid was the name of a disk repair utility that was included in Mac system. First Aid was able to analyze and repair basic hard drive problems. You can try to use it fix crashed SSD on Mac first as follows.
1.Open Disk Utility and select the SSD from the sidebar.
2.Click the First Aid button and then click the Run to start..
3.If SSD is OK or has been repaired, your task is over.
4.Otherwise, click Repair Disk to try the repair process once again.
Method 2. Erase or format the SSD directly to fix it.
As mentioned, the First Aid option can only check and fix some basic issues with the SSD or file system. It may fail to repair the crashed SSD on Mac some times. Then you can need some other methods to help you. Fortunately, there are still some other methods. For example, you can erase or format the SSD directly. Then it will recreate the file system and volume. After erasing or formatting it, there should be no problem to access and reuse the SSD. You can use system built-in Disk Utility to erase the SSD or use another third-party tool to format the SSD.
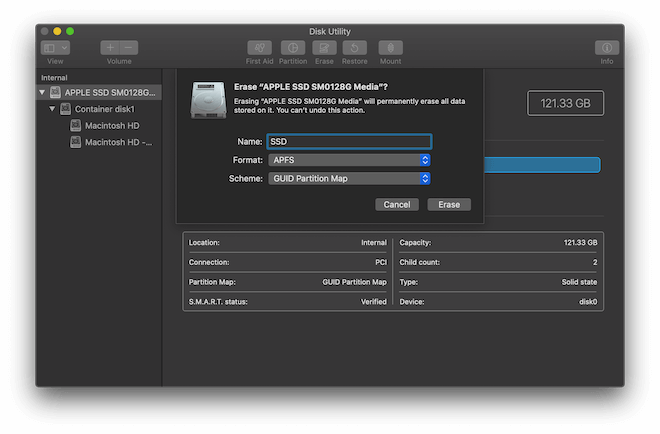
Option 1. Erase the SSD in Disk Utility directly.
1.Open Disk Utility and select the SSD from the sidebar.
2.Click the Erase button and a window will pop up.
3.Enter the Name, choose the format and scheme.
4.Click the Erase button to start the format process.
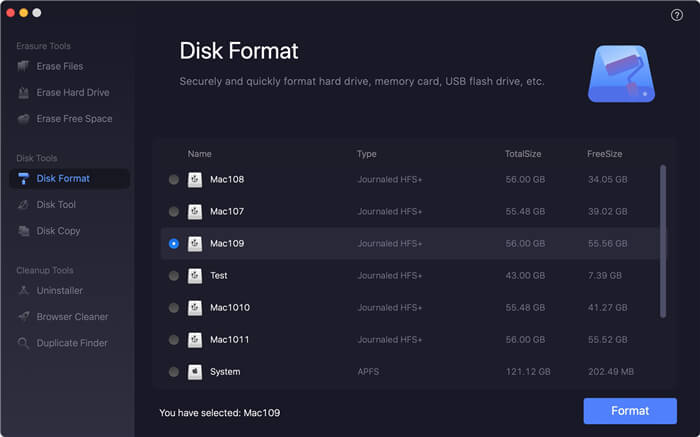
Option 2. Format SSD with a third-party tool. We suggest you use TS DataWiper for Mac. This tool is very easy to use and has many useful tools. One of the functions is to format drive, including the SSD. First, please download the software.
TS DataWiper
The most powerful data erasure software to permanently erase data.
Install and run the software first, then you can format the SSD as follows with a few clicks: Choose Disk Format option in the left sidebar, then select the SSD in the right panel. Click the Format button to start directly.
Actually, TS DataWiper for Mac has more important functions. It can wipe data from SSD, internal/external hard drive, USB flash drive, memory card, and other storage devices permanently. It’s really useful if you want to remove data completely and avoid any data recovery. If you want to remove sensitive or private information from your drive/device, you can download this software to have a try.
